On October 4th, the 2023 Nobel Prize in Chemistry was awarded to Moungi G. Bawendi, Louis E. Brus and Alexei I. Ekimov for their work on quantum dots. These tiny shiny particles have been used in a wide range of applications for decades, lighting up people’s lives. But did you know that with basic chemistry lab materials you can actually make your own quantum dots? You could even use them for a fluorescent Halloween display at your school!

What are quantum dots? Quantum dots are nano-sized semiconductor particles that exhibit quantum mechanical effects, including glowing with bright colors! That is to say, these particles are so small that they behave very differently from larger materials. In order to understand why they behave this way, we have to talk about energy states of electrons. There’s a nice detailed explanation of this in our old post on Electrocuting a Pickle, but for today it’s just important to remember that all atoms have electrons, and those electrons can move between higher and lower energy states. If something like electricity goes in it can push the electrons into a higher energy state, and then when the electron “relaxes” to a lower state it can give off energy in the form of light! That emitted light is called fluorescence.

When a superconductor material becomes as small as a few nanometers, the electrons will be squeezed together due to lack of space, and the wavelength of light emitted in fluorescence will decrease with the decrease of particle size. This means scientists can actually tune what color of light quantum dots will emit by controlling their size!

With this fancy property, quantum dots have been increasingly used in our lives. The luminous properties with controllable colors of quantum dots made them useful to be utilized in computer and television screens, adjusting the emitted light to the desired color. Quantum dots have also been very helpful in biological and medical fields. Due to their small size and fluorescence, quantum dots can be used to stain and visualize cells, to track tumors or bacteria, and also to detect specific chemicals. In addition, quantum dots can help catalyze chemical reactions and make solar cells more efficient. Overall, quantum dots have brought a lot of benefits to our lives.
One specific type of quantum dot is a carbon dot, which means it is made from a carbon-based material. (You can read all about these colorful quantum dots here.) One of the coolest things about carbon dots is that if you have access to a high school or college chemistry lab, you can work with your teachers to make them yourself!
SAFETY NOTE: Ethylenediamine can be corrosive and irritating to skin and eyes. Use caution when handling heated solutions. Students will need supervision to perform the experiment.
Here’s what you need to make your own carbon dots:

Equipment
- A glass vial with a lid for mixing and heating your ingredients
- A dropper or other way to measure in milliliters (mL)
- A glass rod or a magnetic stir bar for stirring
- Conventional microwave
- UV light (to make the carbon dots fluorescent)
Ingredients
- 4.0 M citric acid or malic acid solution
- Ethylenediamine
- Water
Now, we can get started:
Step 1. Add 2 mL of 4.0 M citric acid or malic acid solution to 0.5 mL of ethylenediamine in your glass container

Step 2. Stir the solution for 20 min with glass rod or magnetic stir bar (or by shaking with the lid on)

Step 3. Remove the stir bar if you had one, and remove the lid if it is not microwave safe. Microwave the solution at ∼360 W for 5 min (if you have a microwave with higher watts, microwave for 30 s at a time and check the solution until it become dark yellow as shown in the next step)

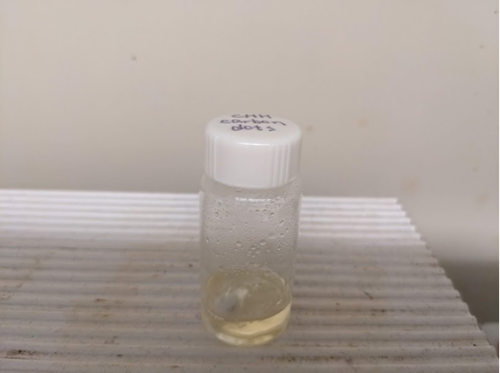
Step 4. Add 10 mL water to the solution, and swirl until the carbon dots are dispersed

Step 5. Enjoy the fluorescence of your carbon dots under UV light!

Carbon dots have tons of potential applications in medicine, agriculture, and electronics. I think they could also be great for Halloween decorations in your classroom! If you make some DIY fluorescent decor, be sure to share it with us in the comments or on social media!

References
- The Nobel Prize in Chemistry 2023 – NobelPrize.org
- popular-chemistryprize2023.pdf (nobelprize.org)
- advanced-chemistryprize2023.pdf (nobelprize.org)
- Coming attractions for semiconductor quantum dots – ScienceDirect
- Carbon Dots: A Modular Activity To Teach Fluorescence and Nanotechnology at Multiple Levels | Journal of Chemical Education (acs.org)
